Radio: Post-production Stage
Lesson - Stage 4: Post-production - Audio Editing
Watch and follow along with the provided step by step video tutorials for Audacity below.
Just a reminder to save your work/project often, regardless of which program you are using. You should also be saving versions of your work/project. ie: "Student Name_Radio Rough_v1" and Audacity will include the file extension ".aup"
Project Specific Audacity Video Tutorials
|
|
Video 1 Highlights:
|
|
|
Video 2 Highlights:
|
|
|
Video 3 Highlights:
|
|
|
Video 4 Highlights:
|
|
|
Video 5 Highlights:
|
|
|
Video 6 Highlights:
|
|
|
Video 7 Highlights:
|
|
|
Video 8 Highlights:
|
|
|
Video 9 Highlights:
|
|
|
Video 10 Highlights:
|
|
|
Video 11 Highlights:
|
Activity - Stage 4: Post-production - Audio Editing
Using the Audio Editor Audacity software and the provided audio production elements media, edit together your new version of the 30 second radio commercial that includes your recorded voices and tagline.
Don't forget, all media content required for the project can be downloaded from the Google Drive folder shared by your teacher.
Just a reminder to save your work/project often, regardless of which program you are using. You should also be saving versions of your work/project. ie: "Student Name_Radio Rough_v1" and Audacity will include the file extension ".aup"
Submission:
Each student is required to submit their completed 30 second radio commercial audio edit.
- Please name the final radio commercial audio file as “Student First Name_Final Radio Commercial.mp3/wav” and submit to the proper inbox within your VLE.
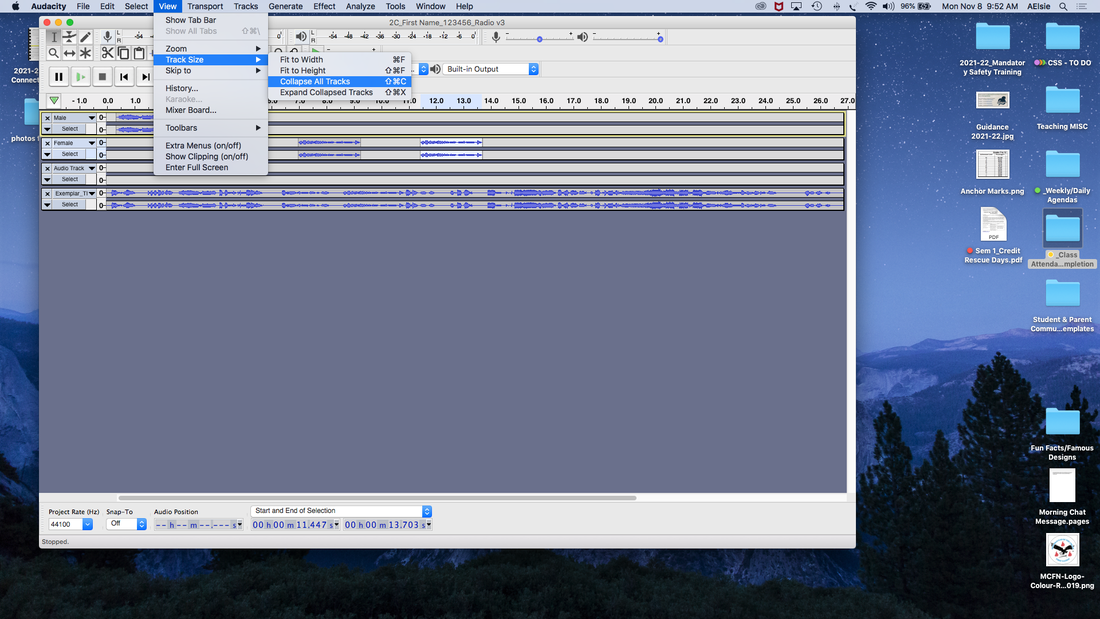
- Please also take a screenshot of your project to clearly show all audio tracks and your workspace with the Audacity or Soundtrap application.
- Follow the steps in the image below of Audacity to collapse all tracks to fit into a single screenshot
Radio Commercial Project Rubric
