Sound Design: Mixing
Merging Audition Multitrack Sessions
(Team foley recording session with independent student session)
Basic Editing in Adobe Audition CS6
Quick Keys
Cmd + K = Cut/Split a clip
J = Rewind (5x speed)
K = Play/Pause
L = Fast Forward (5x speed)
Shift + G = Clip Gain (opens in the Properties window)
- remember there is a difference between track gain and clip gain
M = add Markers to editor (at specific time)
Tip: If you use the commands above with two hands you can learn to edit quickly without having to use the mouse as often. This is quite useful when you need to trim clips of unnecessary audio at the start and end.
Keyframing Audio
- where necessary you can use keyframes to adjust peaks and valleys in volume (dB) of a particular clip
- most helpful for clips that have clipping into the red
Zooming
- Mouse scroll over the track names will zoom IN/OUT
- using the + and - keys with your mouse hovered over a clip will zoom into the editor
Audio Clips - within each audio clip there are two horizontal bands
- yellow band = volume control of clip
- grey/blue band = pan (Left & Right channels) control of clip
Effects Rack (similar to Effects Control in Premiere Pro CS6)
Tip: Effects can be added either to a clip or a track - they will affect the sound(s) as indicated - make sure you choose correctly
- we will apply a Parametric Equalizer (with Hi-Pass and Lo-Pass) to roll up the low end frequencies and roll off the high pitch frequencies for the track
- Reverb is also a very common effect used (mainly for footsteps) - but you only want about 10-25% of the reverb signal (wet) with 100% (dry)
Pre-render Effects
- you may need to pre-render certain effects before they will play back
Mixing Session (Editing for Final Sound Design)
While watching the scene, it’s now time to volume graph each region so it fits in with the scene. Start with the backgrounds, and air tones. Make sure those sit nicely under the dialogue. You can compare each effect to the dialogue. Example, a gun shot would be louder that someone speaking, but if it’s far away in the shot, it would be quieter… This is a very simplified mix technique, but a good starting position. If you want to try some advanced stuff, feel free to pan certain effects Left or Right or anywhere in between, to match the action on screen. Hint…feet always remain centre with dialogue. Also, if you want you can try some reverb FX to make the FX feel more real in the scene. This works well for feet, but you only want about 10-25% of the reverb signal (wet = effects and modifications added) with 100% (dry = raw or original recorded sound). For more on "wet" and "dry" sounds and/or signals read this brief explanation: www.differencebetween.net/technology/difference-between-wet-and-dry-signals-or-sounds/ We mix using reverbs on sends not plugins, but that is a little to tricky for now.
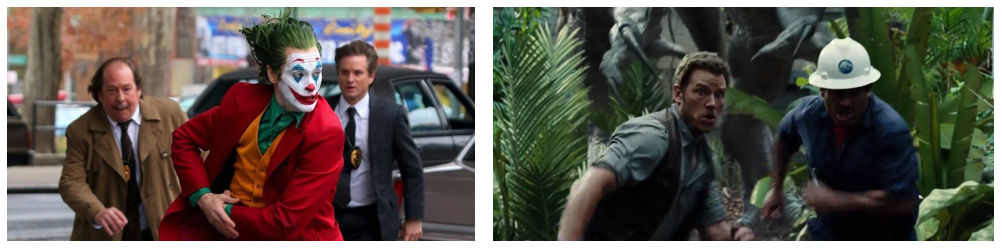
Final Scene Mix: Joker or Jurassic World
Evaluation Requirements: Each student is required to complete the following
- create a sound mix for your chosen film scene
- the mix must be realistic and complement the actions and visual story
- only tracks with final takes incorporated in Multitrack Session of film scene
- tracks must be labelled with appropriate names (ie: Soundtrack, City Street, Car Honk, etc.)
- one sound (not clip) per track (stereo track)
- incorporate background (BG); sound effects (FX); foley (FO) sounds and music in your mix
- sync (timing) to the visual story (BG, FX, FO and music)
- audio levels set to complement realistic representation of visual story
- ensure that the soundtrack does not over power every other audio track and/or sound
- add Effects as necessary to tracks/clips (ie: Reverb, Parametric Equalizer - Hi/Lo Cut)
Tip: Set levels of BG/FX/FO according to the actions and visual story on screen (ie: things seen in the distance should be heard in the distance and things seen from the left side of screen should be heard from the left channel speaker)
Audio Editing Tutorials
|
|
|
Troubleshooting Tutorials
Audition Multitrack Session Screenshots
- Workspace setup
- Track labelling and organization
- Preferences - Setup Effects
- Parametric EQ Settings (this effect needs to be added to each track in your session)
